





Showing posts with label corset. Show all posts

Monday, September 12, 2011

Dinner Dress Begins . . .


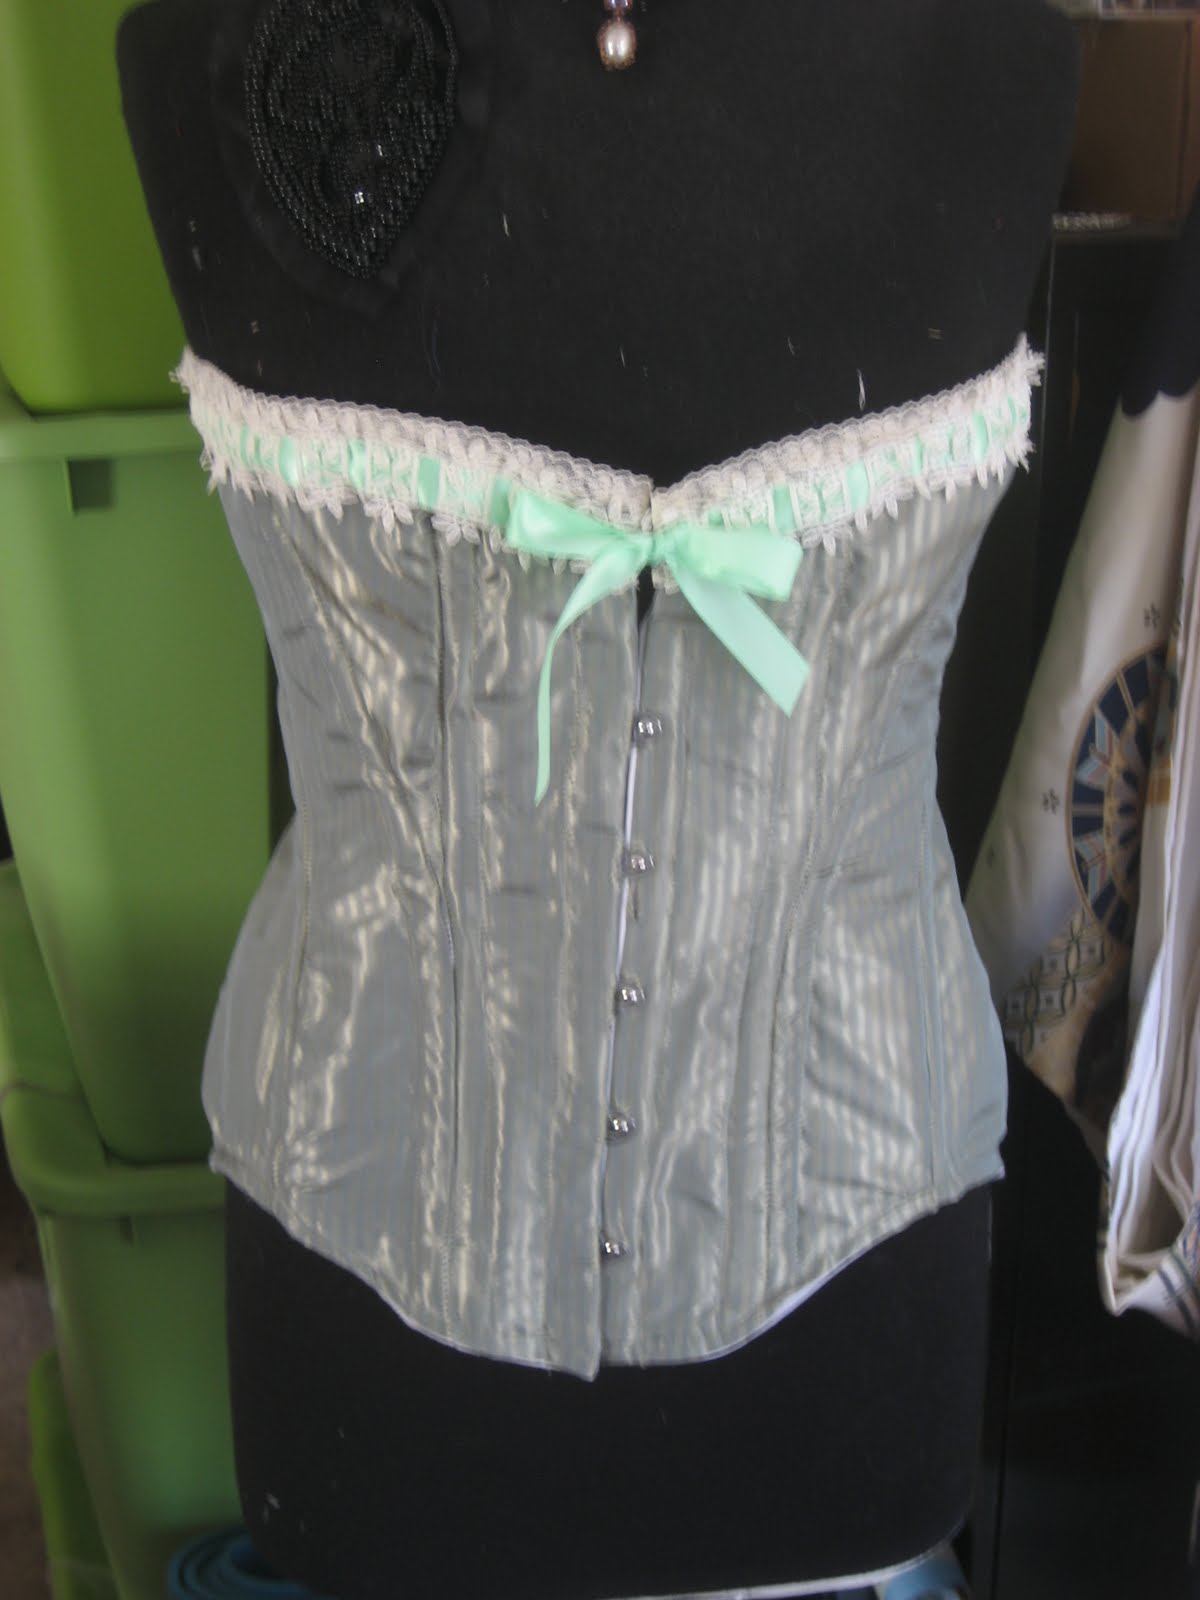
As promised, here's a bit of a diary on the Edwardian corset construction. I used a striped sage satin as the outer fabric, and lined it in a heavy twill and cotton, using a three-layer construction to protect the silk outer layer from shattering.

The construction itself was fairly straight-forward; I ignored the boning chart included with the pattern (as I usually do) and boned along the seams, and it was just a matter of putting everything together. The only real altering I did was to give the front a slight sweetheart shape, which I find more flattering than a straight edge. All told, it took two days, which is about average for me and corsets;)


Once again, I hand-tacked lace at the top edge, threading a mint green ribbon through. I think it sets off the sage silk nicely.


I used Sandra Altman's #106, the 1901-1908 "Straight-Fronted" Corset. It doesn't give me a straight front, but I don't have a particularly straight front to begin with, and even corsets can't do miracles;)

I also started beading the black lace overlay for the Edwardian Dinner Dress. Don't worry; I'm not crazy enough to bead all of it. I'd go blind! I'm intending to bead the bodice (which is what you see the beginning of here), and then 3-4 inches of the edge of the over-skirt. Once it is placed over a white fabric, as you see here, the lace really pops.


There's still a metric ton of beadwork to do, so I guess I better get busy! I do have until April to get it done, so at least I've given myself enough time . . .

Tuesday, October 5, 2010

Favorite Site Tuesdays: Boom Boom Baby Boutique


My loyal readers know: I love me some well-made corsets. That's why I was so excited to discover Boom Boom Baby Boutique! This UK-based corsetiere makes fun and totally flirty corsets the right way: steel bones, quality silks and satins, tight-lacing and gorgeous. These are just my style, and i am completely drooly over the offerings:


And, how fab are these pictures? Pinup sexy all the way.

Check out Boom Boom Baby Boutique; I dare you not to fall in love with their steel-boned perfection;)

Thursday, May 20, 2010

Corsetiere Extraordinaire . . .


I just discovered the work of the amazing Maya Hansen, and boy, do I wish I could pick up one in every style! I'm a sucker for a beautiful corset, and these are simply stunning, with a sense of whimsy, fun, and even goth sensibility that I quite love.


And, her photography is fabulous! I was certainly inspired by images like these for my recent Seamstress of Avalon shoot;)


Doesn't this model look like Kirsten Dunst?

Check out Maya Hansen online, or, if you're in Madrid, check her out in person;)

What do you think, dear readers? Would you spring for one of these beautiful corsets? (I know I would!)

Monday, August 3, 2009

Bellatrix Diaries . . . . part 2

Time for the next chapter in the Bellatrix dress diaries . . . mwah, ha, ha, ha! Okay, that didn't come off sounding as evil as I wanted it to . . . must have something to do with Monday morning . . . (shakes her evil laugh generator, sighs, moves on)

So, progress has been going swimmingly for Bellatrix; the dress went together a dream, as I chronicled in the last post. It only waits for the eyeletting on the sleeves, with Tab can now do since I reset my homepro tool with the correct die for it (I love my setting tool! If I could marry an appliance, we would be heading down the aisle. Maybe that's the solution to my singlehood? Hmmmmm.) The dress also needs some more decorsation and distressing, but it's pretty much complete. That leaves some other details.


The bird-skull necklace. I had a lot of fun sculpting this, maybe a little too much, if you want the truth;) Working from the original, pictured above, and a few pics of a repro by Snapdragon (thank you!), I got this:

I don't really wannt to antique it, but I may, just because it's very bright in pictures. It's slightly bigger than the original as well, but I liked it so much when I was done that I didn't want to start all over again and make a smaller one. You can't have too large a bird skull, I always say!


Onward to the leather corset. The under-base was black twill, put together like a standard under-bust corset and boned with 1/2" spiral boning and 1/4" white bones surrounding the grommets in back. Once the foundation was complete, I moved on to the leather patchwork outer-layer.
I started with several reference images where I highlighted the patchwork lines, and I used the excellent action figure for a decent 360 view. I then laid out my leather pieces, started drawing, and sewed each piece together on the machine. I worked in small sections, so as not to confuse myself with how some of the smaller bits went together! Once the entire thing was sewn together using a leather needle on my machine, I sat on my couch, popped in a movie, and started the laborious hand-sewing of all that decorating stitching. Using a wide-pointed leather hand-sewing needle (made with a spade point to create larger holes in the leather), I looped black soutache around each seam. It took several hours, but I was very happy with the results! Then, I hand-stitched the leather to the twill corset, following each seam so it was very secure and didn't pull or gap anywhere. The leather goes to to the grommets in the back, but stops just before them; I didn't want to try to grommet through two layers of twill and leather!


I'm quite pleased with what we've got so far, though the grey streaks in the wig reflect the light from the camera's flash too well! In person, they are much ore subtle than they appear here;) I'll probably post one more entry before this Saturday; just five days to Chicago Comic-Con!


Monday, April 27, 2009

Corset Tutorial!

The original I based my corset on
Yes, it's true, after complaining up and down how much I hate making corsets, I had to go ahead and make one yesterday. Unfortunately, my old corset, which has served me well for six years, is simply too big now. I took the opportunity to make the corset I've wanted for quite awhile; the blue satin confection pictured above. I had to omit the spoon busk; you can get these from specialty stores like Farthingales, but they cost an arm and a leg! I decided to keep cost down by taking the busk and steels out of my old corset and reusing them, and constructing it out of fabric and trim I already had in the workshop.

This blue crepe-back satin was purchased three or four years ago, for the purpose of making a new corset. I've always wanted a blue one, but you can see how my aversion to making them put this off for so long! I had to wade through a mound of fabric to find this, but I was glad when I did. It is darker than the original, but I like the cornflower color a little bit better.

I decided to use the Laughing Moon Mercantile Undergarment Pattern; my previous corset was the Silverado, but I decided to try the Dore corset instead. Little did I know that in the ensuing six years, the uncut pattern pieces for the Dore had disappeared! Thus began my odyssey: the first drafted corset. I had only the two front pattern pieces for the Dore pattern, so I cut them out, and then looked at the pattern instructions. Using the picture of the other pieces as a guide of the basic shape, my knowledge of corsetry, and my original corset, I drew out the pattern on my twill:

I did make a few mistakes. In order to do a tighter waist-lacing, the hips need to be fuller than I have them here; unfortunately, I didn't realize this until the whole thing was constructed and on! However, for my first attempt, pulling the pattern basically out of my ass, I'm rather proud of myself;)

Next came those distinctive fold-over pleats that the historical one has. These were a major pain, and I should have omitted them, but what can you do? I cut my four front satin pieces extra long, keeping the twill interlining the correct shape, and then pinned the pleats and ironed them, turning the pleats down at the center front and up at the bust seam. I tried my best to match them so the pleats would meet, but something happened in construction to make them slightly askew. D'oh!


Once the pleats were all pinned, I proceeded to sew the satin and interlining pieces together, treating each matching satin and interlining pieces as one piece, flat-lining the top layer, basically. The lining was sewn together as well, and a piece of petersham was sewn on the wrong side of the lining to serve as the waistband. Then, I prepared my top layer to receive the busk.
There are lots of different techniques for this, and I'm sure different corset makers will have different methods, but I always mark out where the busk must come through the fabric and make button-holes for the hooks and knobs to poke through. Once they're complete, I sew the front and lining together at the center-front and center-back seams and turn the two sides of the corset right-side out. Then I insert the busk into each side and sew a pocket to hold it in place, as close to the busk as possible so it doesn't shift at all.


Next, I top-stitched a seam down each seam in the corset, sewing the lining and top-fabric together. Another seam goes next to these, to create the bone channels. Most Victorian corsets take 1/4" white and spiral bones, and the presser foot on your machine is a good guide for how wide the channels need to be. I sewed a seam at the bottom to close the channels off, and inserted my bones. The back two channels, placed on either side of the grommets, are white steel, and the rest are spiral, for flexibility. Once the bones are in place, I sewed the top seam to close them off.

Next, I cut bias strips of fabric and sewed them to the top and bottom of the corset, folding them over in the back and slip-stitching them into place, to give the corset a nice, finished look. I marked my grommets and set them at this time as well.


Finally, I sewed the trim and did the embroidery. In this case, I used two ecru cotton laces, layered over one another. The bottom lace had a definite edge, which I liked, but no space for threading ribbon into it, so I put a thinner threading-lace over it, and put a baby blue single-face satin ribbon through it for some color. At the bottom of the bone channels I embroidered a simple cross-over x, which you find so often in period corsets, to reinforce the ends of the bones. Then, I laced myself in and tightened, and discovered that the hips were a little narrow and the pleats had shifted! Oh, well. It was only 11 hours worth of work, after all. Next time, I'll know better!
My sister's first words? "Now I want a new corset . . . "
Yeah. Next year, Tab. Next year.

Friday, April 24, 2009

Etsy Week Feature: La Belle Fairy

Amazing Classic Sweetheart Black satin Coutil Overbust Victorian Corset

La Belle Fairy was a chance find one day, while I was searching for Edwardian jewelry, of all things. As most of you know, I make corsets when necessary, and as most of you know, I HATE making corsets. I find them tedious and time-consuming to make, so finding someone who loves them and makes them exceptionally well is quite wonderful;) Her corsets are beautiful and historically accurate, which is harder to find than you would think! She covers several periods as well, with early to late Victorian as well as Edwardian silhouettes (she even has a lovely 1770's corset), and she sells some period undergarments and dresses too!


Nude and Silver Coutil steel boned Victorian corset

Cameo Victorian Corset Circa 1896


The next time someone comes to me looking for a corset, I'm sending them here! Check out her blog as well, for a little behind-the-scenes look into the life of a corset-maker of rare skill;)


Tightlacing steel boned custom Victorian corset black coutil circa 1890