Showing posts with label cake. Show all posts

Friday, March 25, 2011

Recipe Fridays!


Red Velvet Cake

I got a request for this here at work, so I guess I'm going to have to try my hand at this one;)

Ingredients
Makes 5 cups batter

Unsalted butter, softened, for pans
2 tablespoons unsweetened cocoa powder, plus more for dusting
2 1/2 cups cake flour, not self-rising
1 teaspoon salt
1 1/2 cups sugar
1 1/2 cups canola oil
2 large eggs
2 tablespoons red food coloring
1 teaspoon pure vanilla extract
1 cup low-fat buttermilk
1 1/2 teaspoons baking soda
2 teaspoons white vinegar


Directions

1.Preheat oven to 350 degrees. Butter pans; line with parchment paper. Butter lining; dust with cocoa, tapping out excess. Set aside. Whisk together flour, salt, and cocoa in a medium bowl; set aside.

2.Mix sugar and oil on medium speed in the bowl of an electric mixer fitted with the whisk until combined. Add eggs one at a time; mix well after each addition. Mix in food coloring and vanilla. Add flour mixture in 3 batches, alternating with the buttermilk and beginning and ending with flour, mixing well after each addition. Scrape down sides of bowl as needed.

3.Stir together baking soda and vinegar in a small bowl. Add baking-soda mixture to batter, and mix on medium speed 10 seconds. Pour batter into prepared pans. Bake until a cake tester inserted into centers comes out clean, 30 to 35 minutes. Let cool completely in pans on wire racks.

Monday, August 23, 2010

Cake as Art, or Art as Cake?

A previous winner

For the last several years, Threadless has sponsored a cake contest where bakers across the country can submit their cake designs based on cool, funky, beautiful t-shirts on Threadless. I have long been a fan of Threadless, which promotes artists' work in a very visual, striking way, so naturally I'm a big fan of Threadcakes.

This year's contest has just wrapped, and there are some truly amazing entries:


Zoe Badillo's interpretation of this popular tee is cute, and also kinda sad. That's emo for ya;)


Holy cow, Lauren Babis. This t-shirt gives me the willies, but not half as much as the cake. Truly amazing. Look at the detail in that pink rabbit!


I love the 3-D styling in Georgette Gamel's cake. Apparently there are a lot of pretzels in the infrastructure;)


I love this tee, and Elizabeth Ball's cake looks good enough to eat, literally. It's not easy to see how to eat some of the entries, but this one looks delicious;)


Wow. Just wow. Megan Matsumoto really nailed the intricate details on this design. And the color is just perfect!


Hilarious and also, strangely, beautiful;) Neli Josefson.


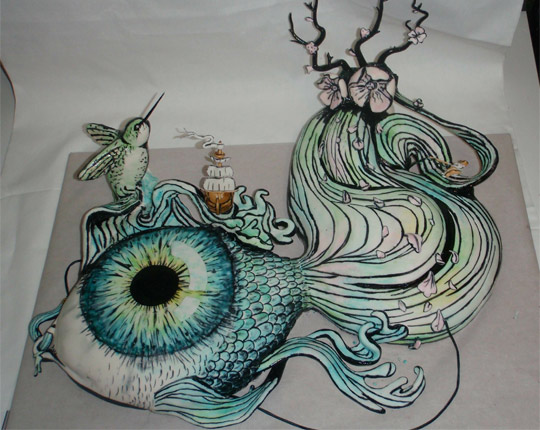
Can you believe this entry from Georgia Suter is a cake?! Apparently, the eye is gumpaste and pastillage. Amazing.


This cake by Jamie Hoffman makes me nearly lose it. I love the drips, and she spent nearly a month drying the pastillage helmet! Incredible!


There are some astonishing 2D cakes as well, and this entry from Erin Morris is just one of them. Can you believe that's all piped? The color fade is perfect!

Check out the rest of the Threadcakes entries, and stay tuned for the announcement if the winner in a week or so!

Tuesday, May 25, 2010

Favorite Site Tuesdays: Lollipop Workshop


This week's featured site is the adorable Lollipop Workshop, recently featured with Martha Stewart Weddings. Woohoo! I discovered their work through a wedding blog I frequent, and they are just charming!If I was getting married, I'd seriously consider one of these fabulous little toppers;)


What's so wonderful about Lollipop Workshop is how customizable their pieces are: haircolor, skin tone, clothing, setting, etc. There are literally hundreds of ways you can make these adorable little figures look like you and your honey;)


Check out Lollipop Workshop and fall in love with their cake toppers. Be aware though: if you want one for your own special day, they're currently super-busy, so you may want to order early!

What do you think, dear readers? Would you love a topper from Lollipop Workshop on your cake?


Wednesday, December 2, 2009

Some of my new faves . . . .


As many of you know, I am constantly trawling the internet looking for new inspirational cakes. My sister and her fiance have yet to decide on a cake design, so I'm always searching for things to show them that just might be exactly what they're looking for. These are some of my new favorites, mixing techniques, colors and styles, and just plain fabulous;)

What do you think, dear readers? Have a favorite wedding cake style?

Friday, November 27, 2009

Recipe Fridays!


Cake Pops

This recipe comes from the wonderful Bakerella, and after having tried it once, I'm ready to try again! They're not easy, especially at the dipping-coating stage, so I think I'll need some practice to get them right. I used a strawberry cake mix and frosting (my favorite), and pink candy coating, but this would work with any mix. It just takes practice to get them looking nice!

1 box cake mix (cook as directed on box for 13 X 9 cake)

1 can frosting (16 oz.)
Wax paper
 candy melts (1 lb. pkg.)
Lollipop sticks

Directions

1. After cake is cooked and cooled completely, crumble into large bowl.
2. Mix thoroughly with 1 can frosting. (I use the back of a large spoon, but it may be easier to use fingers to mix together. But, be warned, it will get messy. Also, you may not need the entire can of frosting, so start out by using almost the entire can and add more if you need to.)
3. Roll mixture into quarter size balls and place on wax paper covered cookie sheet. (Should make 45-50)
4. Melt chocolate in the microwave per directions on package. (30 sec intervals, stirring in between.)
5. Dip the tip of your lollipop stick in a little of the melted candy coating and insert into the cake balls. (Insert a little less than halfway.)
6. Place them in the freezer for a little while to firm up.
7. Once firm, carefully insert the cake ball into the candy coating by holding the lollipop stick and rotating until covered. Once covered remove and softly tap and rotate until the excess chocolate falls off. Don’t tap too hard or the cake ball will fall off, too.
8. Place in a styrofoam block to dry.


Note: I think cake pops are a little more difficult to make than the cupcake pops because of trying to get the candy coating smooth. So, If you haven’t made them before, check out this post for red velvet cake balls and this one for cupcake pops.


Friday, October 23, 2009

Recipe Fridays!

Chocolate Truffle Cake with Raspberry Sauce


This sounds deadly, and I mean it. My birthday's approaching . . . hmmmmmmmm


Chocolate Cake:

3 bars (1.5 ounces each) Godiva Dark Chocolate, coarsely chopped

3/4 cup water

1 teaspoon vanilla extract

2 cups all-purpose flour

1 1/4 teaspoons baking soda

1/4 teaspoon salt

1/2 cup butter, at room temperature

1 1/2 cups granulated sugar

2 large eggs

1 cup buttermilk

Raspberry Sauce:

2 half-pints fresh raspberries (12 ounces)

1/2 cup granulated sugar

Orange Liqueur Syrup:

1/4 cup water

2 tablespoons granulated sugar

2 tablespoons orange-flavored liqueur

Chocolate ganache:

4 bars (1.5 ounces each) Godiva Dark Chocolate, coarsely chopped

3/4 cups heavy cream

3 tablespoons orange-flavored liqueur

Garnish:

Creme fraiche or whipped cream

1 cup sliced almonds, toasted

Make the cake:
1.Preheat oven to 350°F. Line 10-inch by 2-inch round cake pan with parchment or waxed paper. Spray sides of pan with vegetable cooking spray.
2.Place chocolate and water in microwave-safe bowl. Microwave at high (100% power) for 1 minute. Stir until smooth. Cool to room temperature.
3.Sift together flour, baking soda and salt. Set aside.
4.Beat butter in large mixing bowl until softened, using an electric mixer on medium to high speed.
5.Gradually add sugar, beating until light and fluffy. Add eggs, one at a time, beating on medium speed for 1 minute after each addition. Add vanilla. Combine buttermilk and melted chocolate. Alternately add flour mixture and chocolate mixture, beating on low speed after each addition just until combined. Pour batter into prepared pan.
6.Bake 45 minutes or until a toothpick inserted in center comes out clean. Cool in pan on wire rack 15 minutes. Remove from pan. Cool completely on wire rack.

Make the orange syrup:
Combine water and sugar in microwave-safe cup. Microwave at high (100% power) for 1 minute, stirring once, until mixture boils and sugar dissolves. Let cool slightly and stir in orange liqueur.

Make the raspberry sauce:
Combine raspberries and sugar in a medium saucepan. Cook over medium-low heat, stirring constantly with a wooden spoon, until the sugar dissolves completely and berries soften. Remove pan from heat. Strain the mixture through a fine-mesh sieve into a bowl. Cover the bowl with plastic wrap and refrigerate.

Make the chocolate ganache:
Place the chopped chocolate in a medium bowl. Heat cream in a small saucepan over low heat until the cream comes to just under the boil. Remove from heat and pour over chocolate. Let stand until chocolate melts. Stir gently until smooth. Stir in the liqueur. Cover with plastic wrap and cool to room temperature.

Assemble the dessert:
1.Line cake pan with plastic wrap. Place cake layer into the lined pan, top side up.
2.Pour syrup over cake. Let cake stand for 10 minutes
3.Spread cooled ganache over cake. Refrigerate until the ganache is firm, at least two hours. 4.Remove the cake from the pan and place onto a serving plate with ganache on top.To serve, cut cake into wedges. Serve cake with some raspberry sauce and a dollop of creme fraiche or whipped cream. Garnish dessert with a sprinkling of toasted sliced almonds.

Friday, October 9, 2009

Recipe Fridays!

Peanut Butter Cup Mousse Cake

Okay, I know Godiva says this recipe is "advanced", but I soooo want to try this. Peanut butter cup mousse cake? Shut up.

Yield: 12 Servings
Difficulty: ***Advanced
Preparation: 2 hours 30 minutes plus baking, cooling and freezing times

Ingredients
Cocoa Chiffon Cake:
1/2 cup plus 2 tablespoons sifted cake flour
1/2 cup plus 3 tablespoons granulated sugar
1/3 cup Godiva® Hot Cocoa Powder, Dark Truffle Flavor, sifted
1/2 teaspoon baking powder
1/8 teaspoon salt
2 eggs plus 3 egg whites, at room temperature
1/4 cup plus 2 teaspoons vegetable oil
2 teaspoons vanilla extract

Peanut Butter Mousse:
1 3/4 cups (10 ounces) peanut butter chips
3/4 cup whole milk
1/2 cup creamy peanut butter
1 tablespoon vanilla extract
1 cup heavy cream
2 tablespoons confectioner’s sugar

Milk Chocolate Glaze:
5 bars (1.5 ounces each) Godiva® Milk Chocolate, coarsely chopped
1/2 cup plus 2 tablespoons heavy cream
1 teaspoon vanilla extract

Garnish:
1/3 cup unsalted roasted peanuts, finely chopped


Make Cake:
1. Position rack in center of oven and preheat to 350ºF. Lightly butter bottom and sides of a 9-inch round cake pan. Line with a circle of baking parchment or waxed paper. Dust side of pan with flour and tap out excess.
2. Stir together flour, 1/2 cup sugar, cocoa, baking powder and salt in medium bowl.
3. In large bowl, whisk together 2 whole eggs, oil and vanilla until frothy. Sift flour mixture over egg mixture and stir until smooth. Mixture will be stiff.
4. In a grease-free medium mixer bowl, with the whisk attachment, beat egg whites until frothy. Gradually increase speed to medium-high and continue to beat until they start to form soft peaks. Add remaining sugar, 1 teaspoon at a time. Continue to beat until egg white mixture forms a stiff, shiny meringue.
5. Using large rubber spatula, gently fold 1/3 egg white mixture into the egg- flour mixture to lighten it. Fold in remaining egg white mixture. Do not over mix batter. Scrape into prepared pan and spread evenly with a spatula.6. Bake for 15 minutes or until cake springs back when gently touched in center. Cool cake in pan 5 minutes. Invert to wire rack and cool completely.

Make Mousse:
1. Put peanut butter chips into large bowl. In small saucepan, heat milk to a gentle boil. Pour hot milk over peanut butter chips. Let stand 30 seconds. Whisk until smooth and add peanut butter and vanilla. Let stand 5 minutes or until tepid.
2. In chilled bowl, beat cream and confectioner’s sugar just until soft mounds barely start to form and cream in still pourable. Do not over beat cream. Gently fold 1/3 whipped cream mixture into peanut butter mixture to lighten it. Fold in remaining whipped cream. Do not over mix mousse or it will become grainy.

Assemble Cake:
1. Lightly oil bottom and side of a 9-inch fluted tart pan with removable bottom. Line bottom and ides of pan with plastic wrap, smoothing out any wrinkles, and pressing it into ridges on sides of pan. Scrape peanut butter mousse into pan and spread it in an even layer, filling in all fluted indentations in side of pan with mousse.
2. Remove paper circle from bottom of cake. Place cake on top of mousse in tart pan and gently press into place. Cover layer of cake with plastic wrap. Freeze for 3 hours or until firm.
3. Remove plastic wrap from cake and invert onto a cardboard cake round. Lift off side and bottom of tart pan, using a thin bladed knife if necessary. Peel off plastic wrap from peanut butter mousse layer.

Make Milk Chocolate Glaze:
1. Put milk chocolate in medium bowl. In small saucepan heat cream to a gentle boil. Pour hot cream over chocolate. Let mixture stand for 30 seconds. Whisk until smooth. Stir in vanilla.. Cool glaze until it starts to thicken slightly.
2. Place cake on a wire rack over baking sheet. Pour milk chocolate glaze over cake, covering it completely. Refrigerate on wire rack for 5 minutes or until glaze is set. Sprinkle cake with chopped peanuts and refrigerate until serving.

Friday, October 2, 2009

Recipe Fridays!

Three-Layer Apple Cake
from Martha Stewart

This time of year, I love spiced cakes with things like apple, pear, and pumpkin flavor. This sounds absolutely scrumptious;)

Ingredients
Serves 12

FOR THE CAKE
1/2 cup (1 stick) unsalted butter, melted, plus more for pans
2 cups all-purpose flour (spooned and leveled), plus more for pans
2 teaspoons baking soda
1/2 teaspoon baking powder
2 teaspoons ground cinnamon
1/2 teaspoon ground ginger
3/4 teaspoon salt
2 cups packed light-brown sugar
2 large eggs
4 Granny Smith apples, peeled, two coarsely grated and two diced

FOR THE BUTTERCREAM
4 large egg whites
1 cup packed light-brown sugar
1/4 teaspoon salt
1 1/2 cups (3 sticks) unsalted butter, room temperature, cut into pieces

Directions
1.Preheat oven to 350 degrees. Butter three 8-inch-round cake pans; line bottoms with parchment paper. Butter, then flour paper and sides (tapping out excess); set aside.
2.In a medium bowl, whisk together flour, baking soda, baking powder, cinnamon, ginger, and salt; set aside. In a large bowl, whisk together butter, sugar, and eggs until well combined; fold in grated and diced apples. Add flour mixture; mix just until combined. Divide batter among prepared pans; smooth tops.
3.Bake until a toothpick inserted in center of cake comes out clean, 35 to 40 minutes. Cool cakes in pans 20 minutes, then invert onto wire racks; peel off parchment. Invert cakes again, and let cool completely on racks.
4.Make buttercream: In a heatproof bowl set over (not in) a pan of simmering water, whisk together egg whites, sugar, and salt until sugar has dissolved; remove from heat. Using an electric mixer on medium, beat mixture until fluffy and cooled, about 15 minutes. Increase to high; beat until stiff peaks form. Reduce to medium-low; gradually add butter, beating until fully incorporated, about 3 to 5 minutes.
5.Assemble cake: Place one layer on a serving plate; spread top with buttercream. Top with another layer; spread top with buttercream. Top with third layer; spread remaining buttercream over top and sides of cake. Refrigerate at least 1 hour (or up to 4 days). To serve, bring cake to room temperature; slice with a serrated knife.

Friday, June 5, 2009

Recipe Fridays!

Lemony Angel Food Cake
from Martha Stewart.com

This week's recipe is the cake I made for the office birthdays; the girl who has a birthday in June likes lemon, so this was a no-brainer. I omitted the candied lemon flowers as being a little too precious, and I don't own an angel food cake pan, so I just made it a regular layer cake with some of the lemon creme frosting between the layers. It smelled cheerfully of lemons all throughout the apartment while I was making this; hopefully it will be a hit! Certainly, the frosting was so soft and spreadable that it frosted really quickly and easily; makes me wish I hadn't gotten up at 5:30 this morning to frost it, as I ended up with a lot of extra time on my hands!

Ingredients

Makes one 10-inch cake; Serves 10 to 12

FOR THE CAKE
· 1 cup sifted cake flour (not self-rising)
· 1 1/2 cups sugar
· 12 large egg whites
· 2 tablespoons finely grated lemon zest
· 1 tablespoon plus 1 teaspoon fresh lemon juice
· 1 teaspoon cream of tartar
· 1 teaspoon pure vanilla extract
· 1/4 teaspoon salt
FOR THE LEMON CREAM
· 1/2 cup fresh lemon juice
· 1/2 cup sugar
· 1 tablespoon cake flour (not self-rising)
· 1/4 teaspoon salt
· 1 1/2 cups heavy cream, chilled
· 1 tablespoon finely grated lemon zest
FOR THE CANDIED LEMON-PEEL FLOWERS
· 2 cups sugar
· 2 cups water
· 6 lemons

Directions
1. Make the cake: Preheat oven to 325 degrees, with rack in lower third of oven. Sift flour and 1/2 cup sugar into a bowl.
2. Whisk whites with a mixer on medium speed until frothy, about 1 minute. Add lemon zest and juice, cream of tartar, vanilla, and salt; continue whisking until soft peaks form, about 2 1/2 minutes. With mixer running, gradually add remaining cup sugar.
3. Increase speed to medium-high; continue whisking until firm, not stiff, peaks form, about 2 minutes. Sprinkle whites with 1/3 of the flour-sugar mixture. Using a rubber spatula, gently fold to combine. Sprinkle remaining flour-sugar mixture over whites in 2 additions; gently fold to combine.
4. Transfer batter to a 10-inch angel food cake pan with legs. Gently run a knife through the center of the batter to remove any air bubbles. Bake until a tester inserted into center comes out clean, 45 to 50 minutes.
5. Remove pan from oven, and invert onto its cooling legs (if your tube pan doesn't have legs, invert it over the neck of a wine, or similarly shaped, bottle to cool); let cool, 1 1/2 to 2 hours. Run a knife around the inner and outer edges of cake to remove. Invert onto a serving platter. (Use a knife to separate cake from bottom of pan.) Let cool on a wire rack. Unfrosted cake can be stored in an airtight container for up to 2 days.
6. Make the lemon cream: Prepare an ice-water bath. Whisk lemon juice, sugar, flour, and salt in a small saucepan over medium-high heat. Bring to a boil; whisk constantly for 1 minute, until it thickens. Transfer to a heatproof bowl set in ice-water bath to cool completely, stirring occasionally. Meanwhile, whisk cream and lemon zest with a mixer on medium speed until medium peaks form, about 3 minutes. Gently fold whipped cream into juice mixture in thirds. Refrigerate lemon cream, up to overnight.
7. Make the candied lemon-peel flowers: Combine sugar and water in a large saucepan over medium-high heat, stirring until sugar dissolves. Bring to a simmer. Meanwhile, using a vegetable peeler, peel 3 lemons to create 6 long strips (at least 5 inches long and about 1/2 inch wide). Remove pith from strips using a paring knife. Cut tops and bottoms off remaining 3 lemons; cut each in half lengthwise. Remove flesh. Cut out 6 flowers from the peels using a 2-inch flower-shaped cookie cutter and remove pith; cut indentations into petals for definition. Punch a hole in the center of each flower using a 1/4-inch plain round piping tip.
8. Add lemon-peel strips and flowers to the syrup. Gently simmer until translucent and tender, about 35 minutes. Remove peels from syrup using a slotted spoon, and transfer to a wire rack set over a parchment. Let dry slightly, about 30 minutes.
9. Trim strips to 5-inch lengths, and roll each to form centers of flowers; fit into flower holes and let stand on wire rack until slightly dry but still sticky, about 30 minutes.
10. Frost cake with lemon cream. Garnish with candied flowers. Serve.


Wednesday, May 13, 2009

I heart Williams-Sonoma


Can I get married just so I can register at Williams-Sonoma?

You think I'm kidding.

I am seriously into puttering in the kitchen, especially when it comes to baking; the more elaborate the recipe, the more I want to try it. I have made things like Raspberry Trifle, New Orleans-Style Bread Pudding, Chocolate Ganache Cake with Truffle Eggs, Apricot-Almond Cake with Spun Sugar. . . the list goes on and on. Whenever I get a cookery catalog or wander into a Kitchenware section in a store, my mouth starts to water for silpat sheets and piping bags, cupcake pans and mandolins.

Williams-Sonoma is like porn to me.

Take one of their latest cake pans: Williams-Sonoma Goldtouch™ Sandwich-Cookie Cake Pan

Not only do you get two adorable cake pans that make your cake look like an enormous Oreo, but you get to be the envy of all your friends at the next housewarming or dinner party. "How on earth did you do that?" And, you will smile, sphinx-like, and simply laugh quietly;)


Then, there is this ridiculously-expensive-and-fabulous stand mixer: KitchenAid Professional 620 Stand Mixer

This thing is truly a thing of beauty, and it will practically fold your socks for you, if you ask it nicely. Sure, it's almost $900, but a girl can dream, right?


Finally, the piece de resistance:

No more messy plastic bags with a hole cut into them, squeezing and getting clogs and having frosting go everywhere! This thing is awesome.
Why do brides get to have all the registry-fun, anyway? There should be perfectly commonplace reasons for singletons to get to register for kitchenware and small appliances!
Until then, pass me the Williams-Sonoma catalog, and turn down the lights . . . ;)

Friday, May 1, 2009

Recipe Fridays!

Vegan Gluten-free Lemon-Orange Buttercream Cake

When you work in an office where there are multiple people who have gluten or dairy allergies, making birthday cakes can be an exercise in futility. "This one has not dairy but uses flour!" "This one is flourless but has six eggs!" It's nice to find a decent cake recipe that is free of both;)
This recipe comes from Daring Bakers.

Ingredients

For the Cake
2 1/4 cups Favorite GF flour blend (I used Bette Hagman�s gourmet blend- white rice, potato starch, tapioca starch)
1 tablespoon baking powder
1/2 teaspoon salt
1 1/2 tsp. egg replacer
1 tsp. xanthan gum
1 1/4 cups carbonated lemon soda (dairy-free alternative to buttermilk, carbonation lightens GF cakes)
3 ener-g foods egg replacer eggs (6 tbsp water, 4 � tsp egg replacer, whisked together)
1 cup sugar
2 teaspoons grated lemon zest
1 stick (8 tablespoons or 4 ounces) earth balance vegan spread, or other GF DF butter substitute (coconut oil?) at room temperature
1/2 teaspoon pure lemon extract
1/2 tsp pure vanilla extract

For the Buttercream
3 tbsp sweet rice flour
1 cup milk substitute (soy, rice, almond)
3/4 cup Earth Balance Margarine *substitution not recommended*
1 tsp lemon extract
1 tsp vanilla extract
2/3 cup sugar
*fresh lemon juice* (optional- test this with a small sample of the frosting to make sure it won’t cause it to separate, or can re-congeal if whisked heavily.)

For Finishing
2/3 cup orange marmalade

Directions

Getting Ready
Center a rack in the oven and preheat the oven to 350 degrees F. Butter two 9 x 2 inch round (or square) cake pans and line the bottom of each pan with a round of buttered parchment or wax paper. Put the pans on a baking sheet.

To Make the Cake
1. Sift together the flour, baking powder, salt, egg replacer, and xanthan gum.
2. Whisk together the egg replacer eggs in a small bowl.
3. Put the sugar and lemon zest in a mixer bowl and beat with your margarine until you have a nice, creamy texture. Add your egg replacer to the mixture and beat again until thoroughly combined.
4. Remove the mixer bowl from the stand and gently fold in your carbonated beverage (or dairy/substitute) and any additional seasonings. *consider adding 1 tsp. cider vinegar here*
5. Slowly sift your flour mixture into the bowl, folding in after 1/3 of the flour has been added. Add another 1/3 of the flour mixture, fold, and add the rest, folding until you have a nice cake texture. Consider adding 1/4 cup applesauce if the batter seems dry.
6. Divide the batter between the two pans and smooth the tops with a rubber spatula.Bake for 30-35 minutes, or until the cakes are well risen and springy to the touch; a thin knife inserted into the centers should come out clean.
7. Transfer the cakes to cooling racks and cool for about 5 minutes, then run a knife around the sides of the cakes, unfold them and peel off the paper liners.Invert and cool to room temperature, right side up (the cooled cake layers can be wrapped airtight and stored at room temperature overnight or frozen for up to two months).

To Make the Vegan Buttercream Recipe
1. Combine your milk substitute beverage and sweet rice flour in a pan and whisk until thoroughly combined.
2. Heat on a burner and bring to a boil. Lower temperature and simmer, letting mixture thicken. Take off burner and let cool.
3. Meanwhile, whisk your margarine, lemon extract, and sugar together in a mixer or with a hand-held mixture until combined and creamy. When the milk sauce is cool, beat into the sugar-margarine mixture and pour into a container.
4. Cool in refrigerator until ready to frost cake (at least an hour).

To Assemble the Cake
If your cakes rose adequately, you can slice the layers in half. If not, just use the cakes as is, shaving off the bumpy top to have a nice, flat surface if desired. Spread each layer with orange marmalade and your vegan buttercream, placing cake layers together and finally topping with marmalade and then buttercream. If desired, you can place cookie cutters or biscuit cutters on the top of the cake and fill each one with a thin layer or marmalade for additional decorative pop (And flavor). Remove mold and enjoy your modern, delicious, vegan and gluten-free cake!

Serving
The cake is ready to serve as soon as it is assembled, but I think it's best to let it sit and set for a couple of hours in a cool room, not the refrigerator. Whether you wait or slice and enjoy it immediately, the cake should be served at room temperature; it loses all its subtlety when it's cold. Depending on your audience you can serve the cake with just about anything from milk to sweet or bubbly wine.